Noobies VÜ

random mutterings and musings by me, myself, and I.

2/17/2014

Kitchen 2.0!

Posted by vanashke001

Hootie Hoo!
Got down to work again the last couple of weeks and redid my kitchen. I would love to eventually change the layout but until I have the moola for that I just have to update it when I can.
When I moved in the cabinets were tragic, you can check out my earlier posts about it here.
I have liked the black cabinets for a while now but I noticed that they show every little bit of dust as well as cat hair on the lower cabinets. I have no problem cleaning up after them but they never really seemed to come fully clean.
I also decided that they darkened the kitchen quite a bit and the appliances just faded into the background. I found a kitchen on Houzz that had grey cabinets and since that's a major color in my house I decided it might work out in the kitchen as well. 
I didn't want to go the same route that I did in the rest of the house however as I was hoping to avoid having everything blend together. Plus, with grey cabinets I didn't want them to blend into the background as well. I found a really nice blue from Behr that was just gorgeous and complimented the french silver I decided on for the cabinets. At first I was concerned that they would be too light as they weren't quite the grey I had originally planned on. I also thought at first that they looked a little baby blue-ish but they did turn out a very light grey so I'm happy. 
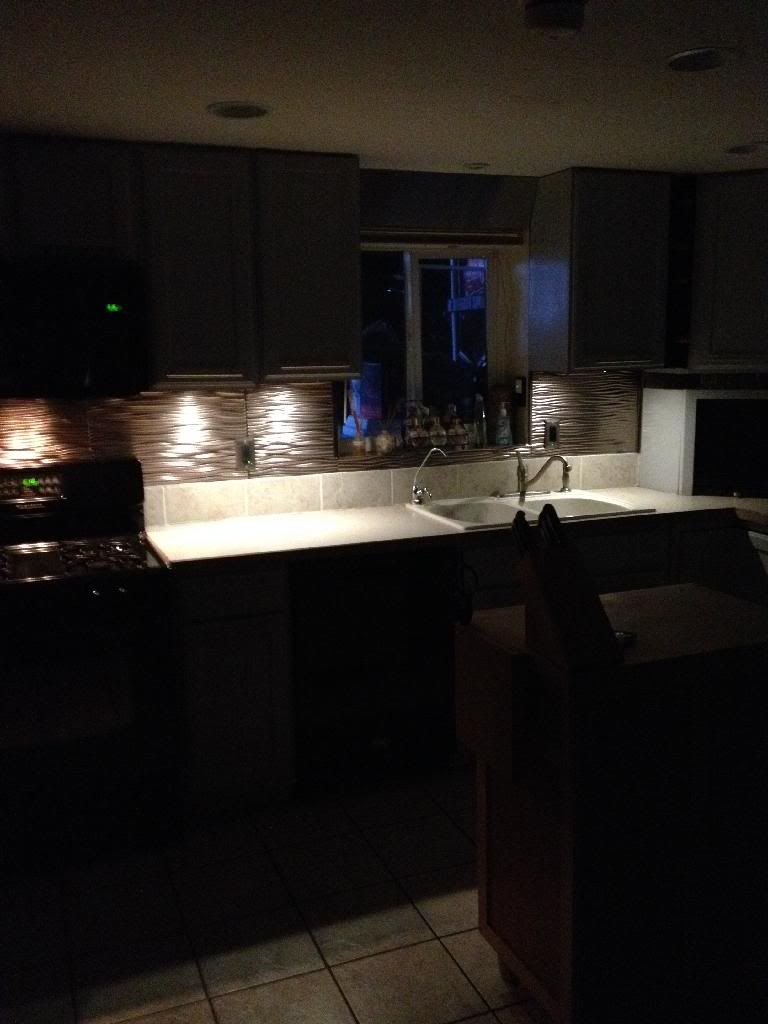
I also had to add some lighting as there was no light above the sink and I decided under cabinet lighting would be good as well. I am so excited about how it all turned out, throw in the Fasade backsplash and I am truly a happy camper. 
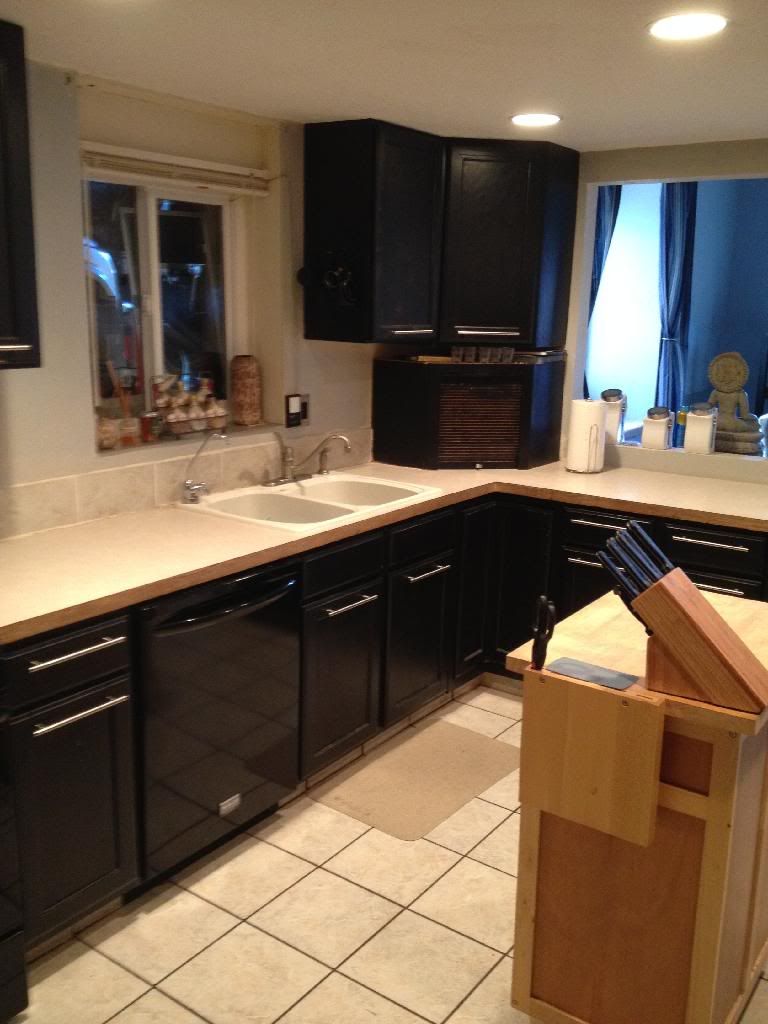
Before 
This is the black I had prior, also note the walls that hadn't been fully painted to the left and above the stove. It's true, we lived with that for at least a year. (as always, click on the pics to embiggen)
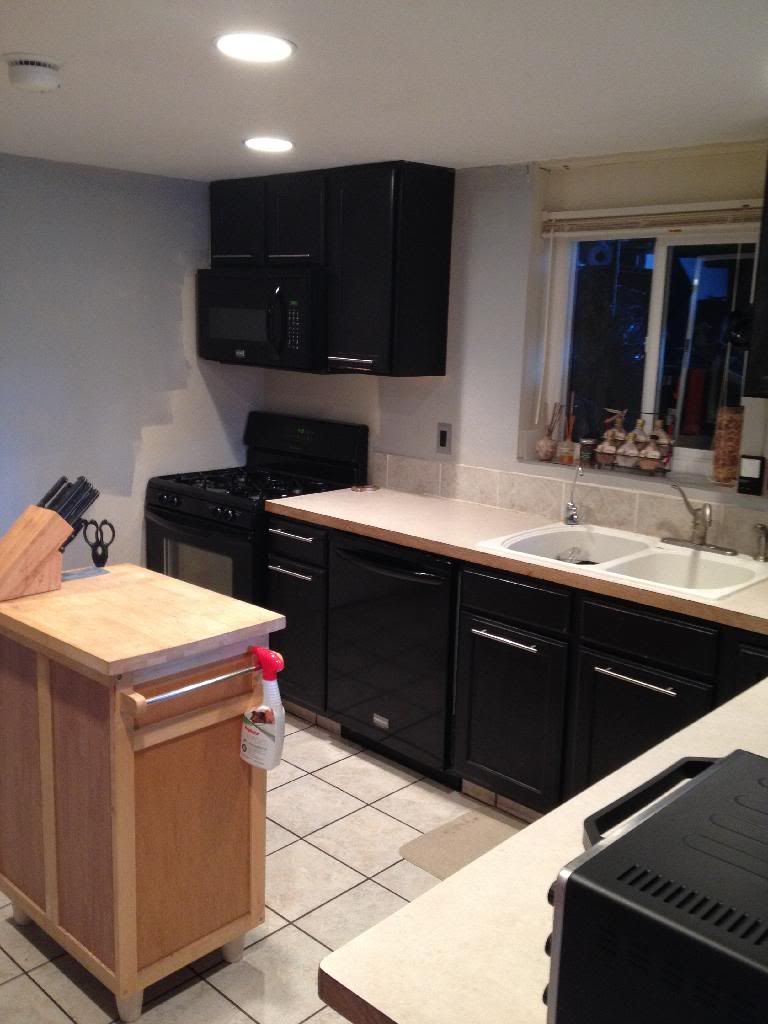
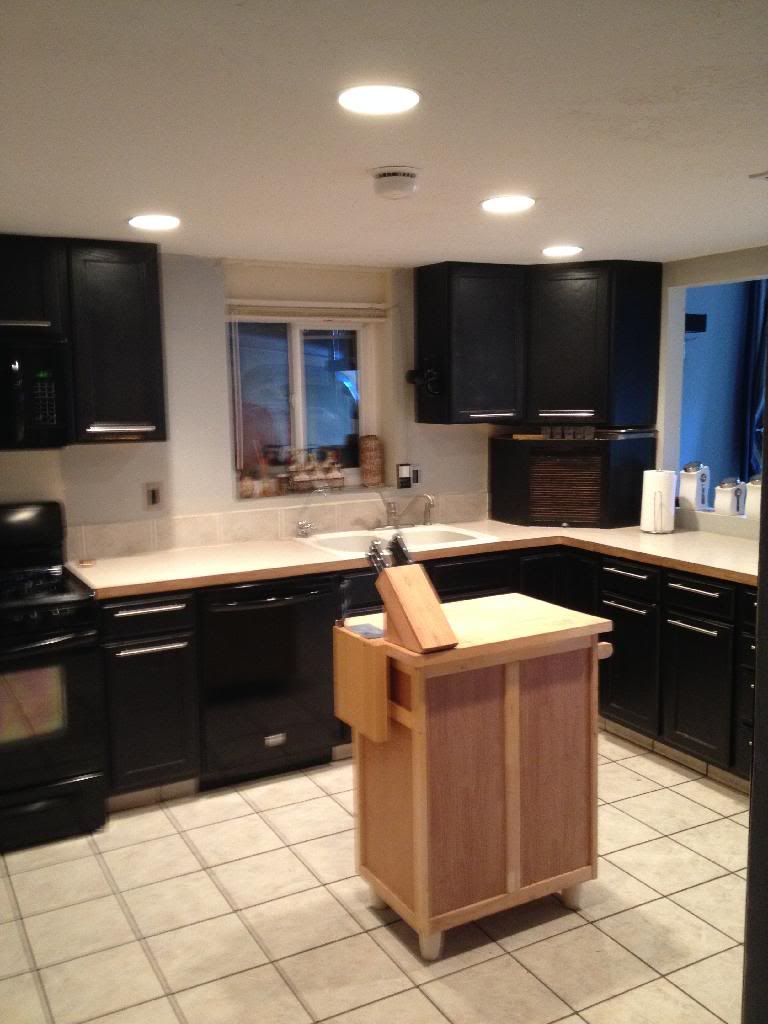
 I still think the black looked good, very modern but still. Another angle. I also never finished painting the roll up door on the appliance garage.
And the last one, before.
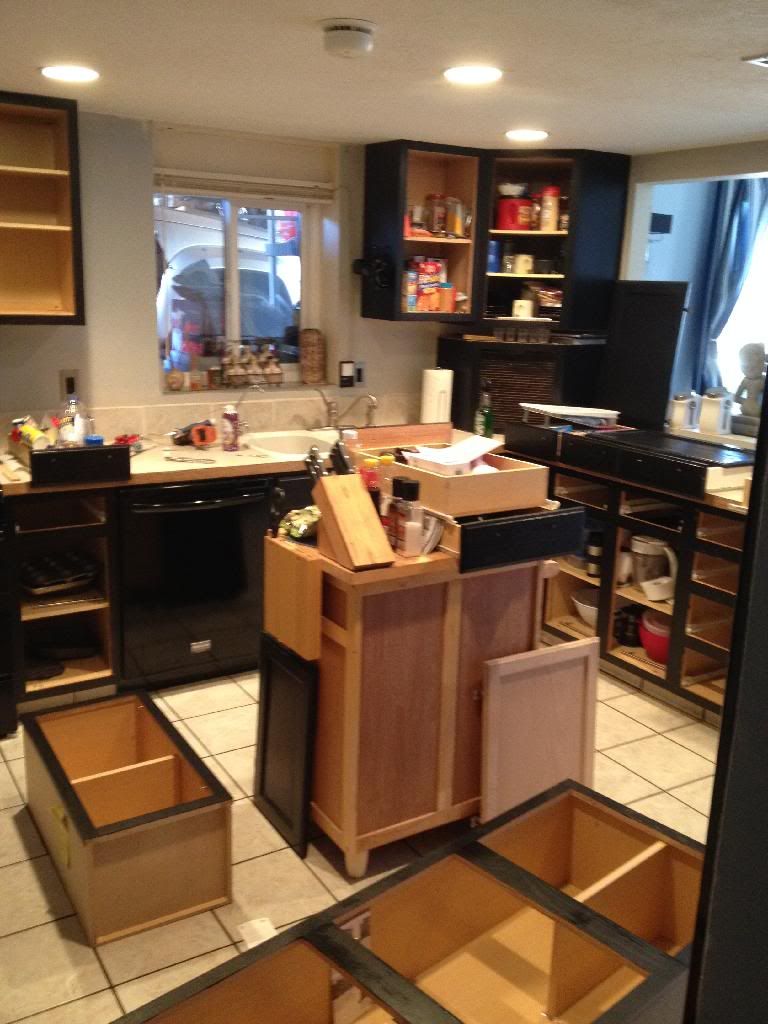
During the process:
The ones on the floor are new. The 3 door cupboard is for the laundry room.
After painting, loving the blue and grey. Eagle eyed viewers will notice the new cabinet. Thou shalt ignore the messy pantry.
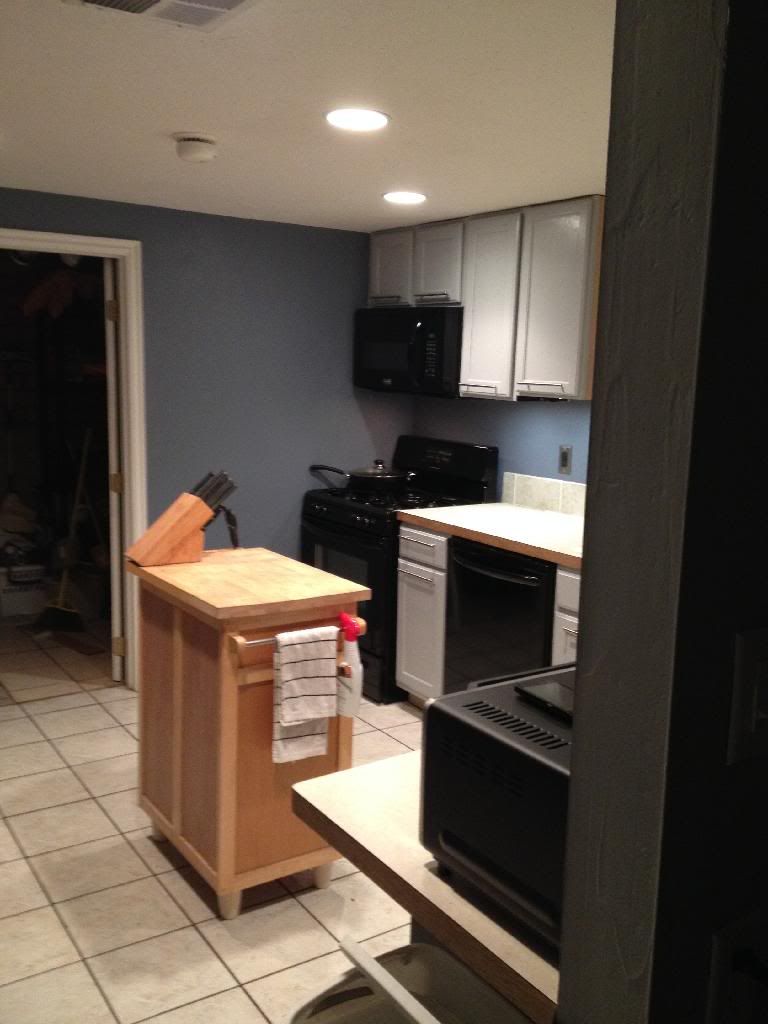
Another angle:
Looks much fresher, cleaner, and also brighter. The black cable is for under cabinet lights that I added.
Yay, let there be light!
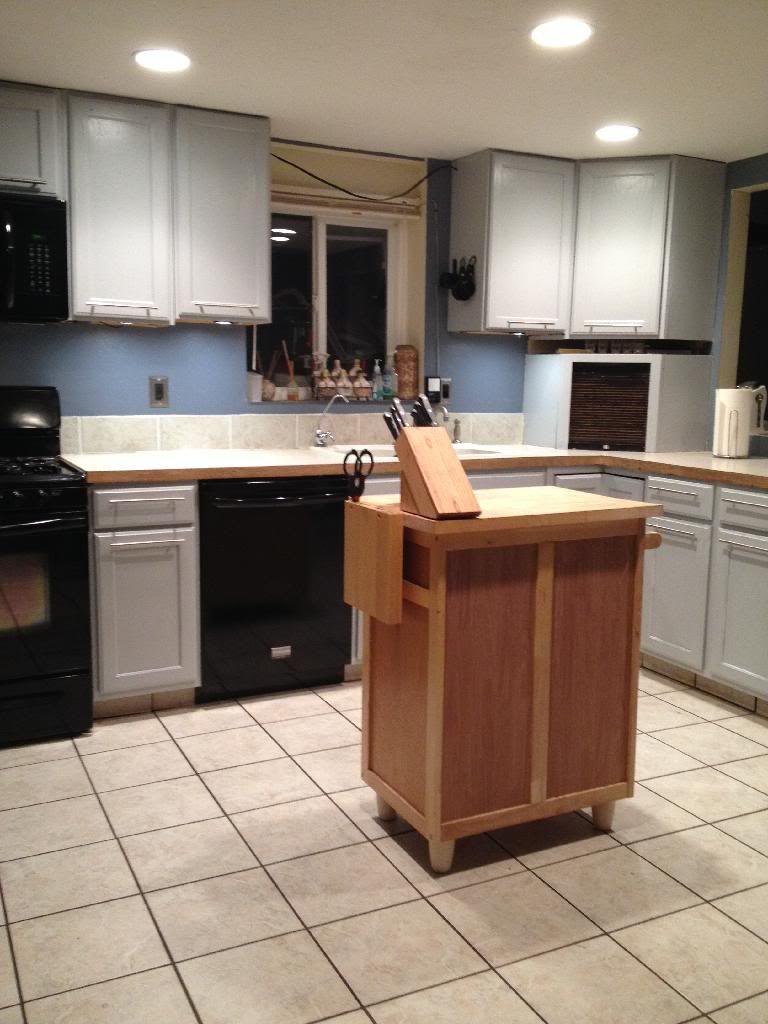
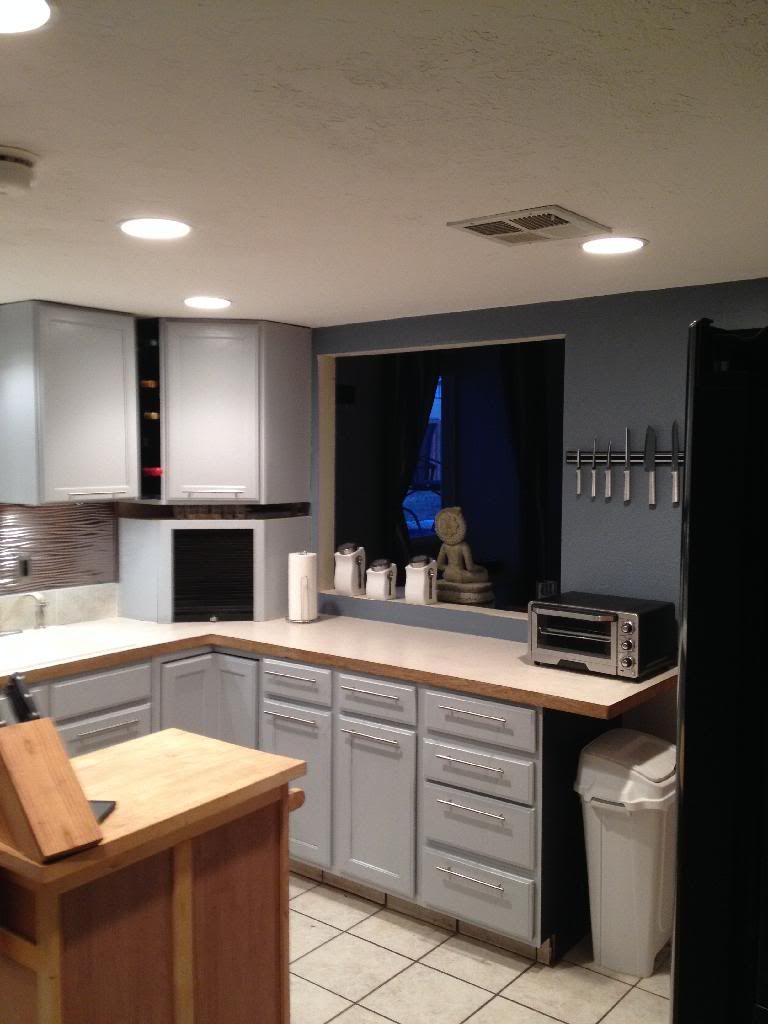
And now for the full after, I added some Fasade panels for a fun and interesting backsplash.
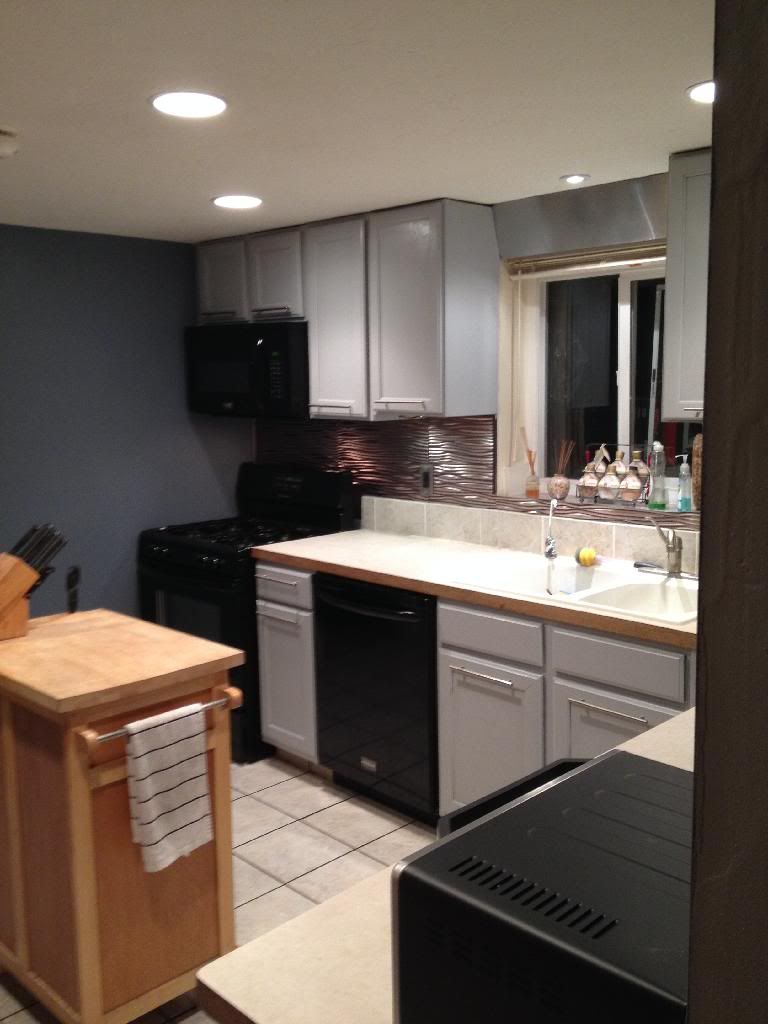
If you look closely you'll also see an added spotlight above the sink along with a stainless steel panel I am using to cover the wiring for the under cabinet lights.
I moved the right hand cabinet to the left to align it with the window. This opened up a space between it and the corner cabinet. I decided to add a wine rack/display shelf. Thou shalt ignore the garage.
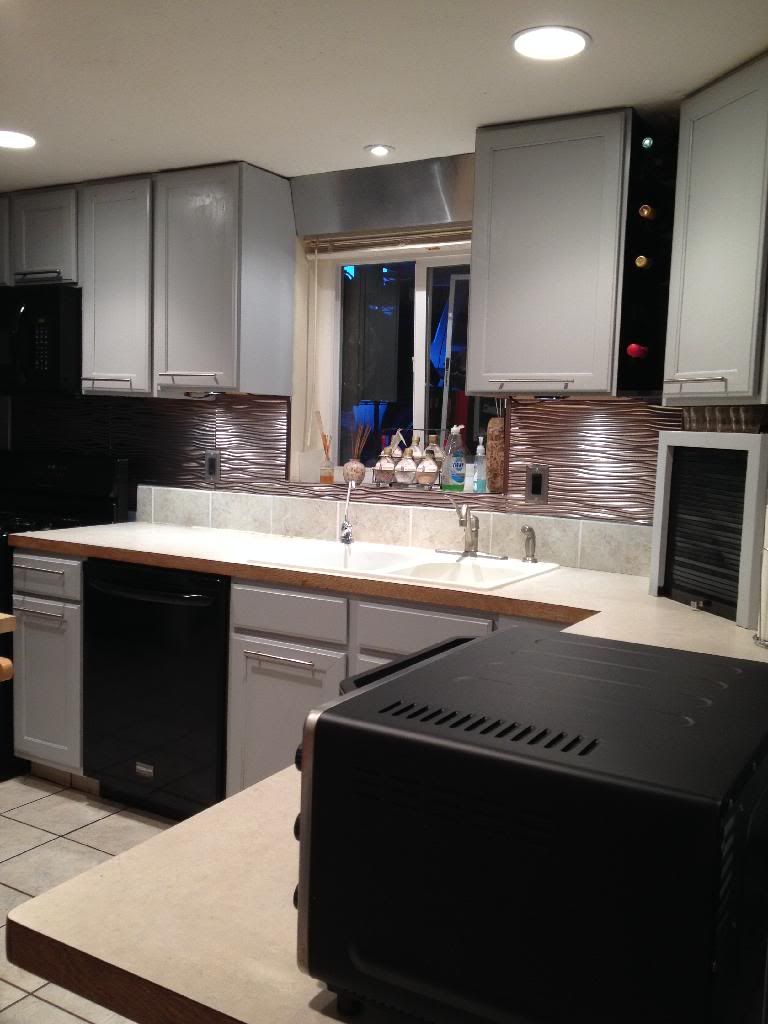
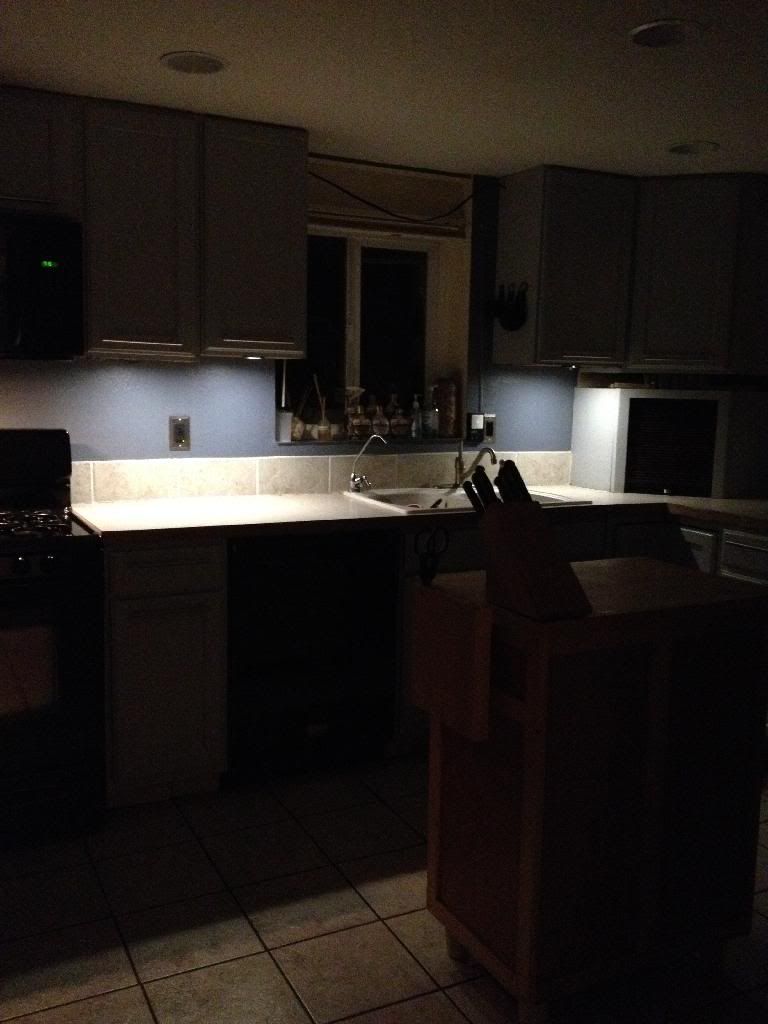
And now with just the accent lighting. It's funny that I used to think that the light above the oven was bright, now even with the under cabinet lights at their dimmest the oven's are still dimmer. There is no garage.
I even got my knives and magnetic knife rack installed!
I still have some plans for the future but it will be a while. I'd like to do a faux poured concrete counter top. I found a really groovy how-to on Pinterest that I am dying to do. It'll take 3 days though and I would have to remove the sink to do it. I'd love to one day align the sink with the window, right now it's almost a foot off center and it's annoying, but I would have to redo the whole floor plan.
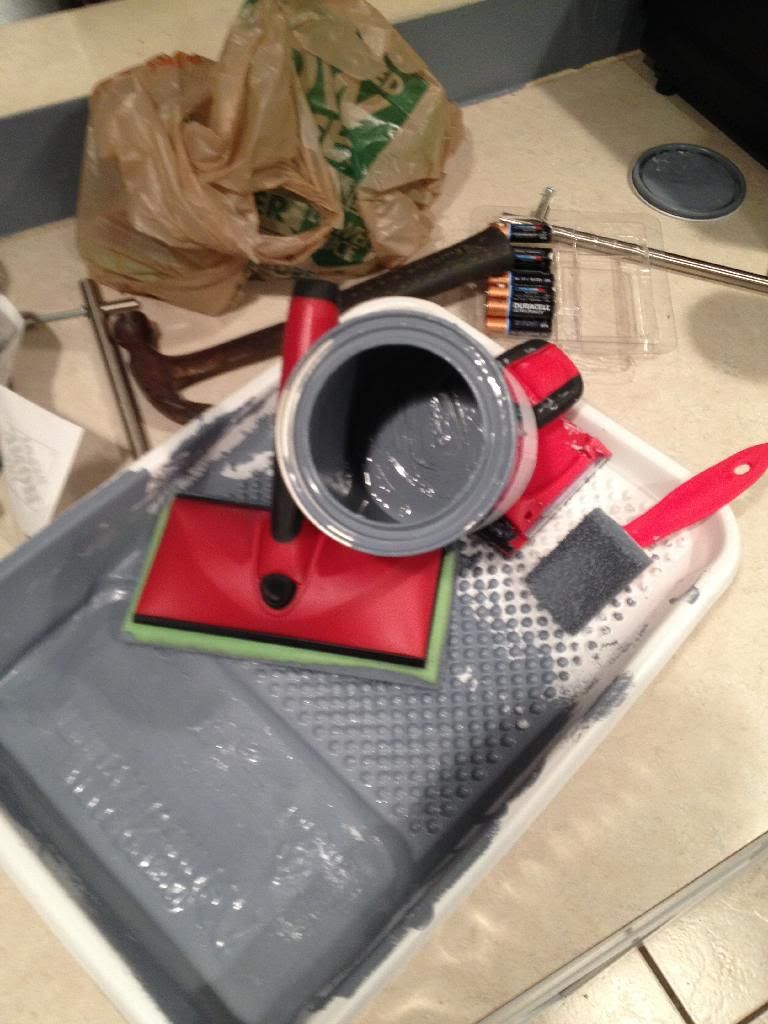
I was being really stingy with the paints I used. I didn't want have a bunch to waste so I just bought pints. I'll tell you, it was a close thing. I could have saved myself a little bit had I not painted before I put up the backsplash but since I wasn't sure when I would be able to get them I thought it would be good just in case. Then I decided to paint the wall beside the fridge, I just barely had enough and when I say barely, I mean scraping the sides of the can like a jar of peanut butter.
This is what I had left:
6/09/2013

Cheap Bastards

Posted by vanashke001

Once again I take up my hammer to try and make some improvements to my house. This one is gonna take a little time though, couple weekends worth.
My house is an odd house dear readers, it's kind of a stupid house, it's also unique and I do like it, but damn, every time I try to improve it I run into the idiocy of the former owners.
It gets wretched hot upstairs and I have a real difficult time dealing with it. It's one of those things that I find myself surprised that the people who lived here previously tolerated it. 
I was dubious that there was any insulation on the rear wall and the outside sheathing is looking really bad so I decided to put up some vinyl siding. After an annoying experience with an asshat for customer service at Lowe's (apparently I shouldn't shop for things on Sundays- duh.) I wound up at Home Depot and I found some really inexpensive siding.
Just a little aside, Lowe's has a ton of siding on their website, but they tell you there are 4 profiles and 12 colors, I challenge someone to locate them. Home Depot on the other hand doesn't have anything on their site except for fixture mounts. WTF? This was the reason for my trip to Lowe's but look out! Lowe's doesn't carry siding in their stores, you have to special order (just don't try to look for samples on a Sunday). But Home Depot actually carries siding.
Back to the siding I found at HD. They had a single box of 4.5" double lap for $46! They only carry 5" double lap now I guess. I can also tell you a single box will help no one. Except me! I only have to cover the upper bit above the back roof and it's 32' x 32" and this is more than enough for that. Just FYI, a box of siding is normally $158.
Here's the tragic back of my house, don't judge me I have a budget. lol


I pulled off the old sheathing to take a look at what was under it; I figured if I was going to side it I should go the extra mile and address the insulation as well.
This is what I found...

Just so you know, that is my AC ducting. The silver bit is about the size of a stock pot. So, most of my heating and cooling has been going into the void. Sigh.

Here's another shot in from a different area. They really did just redneck everything in this house. sigh


Last night and early this morning I put in more insulation (The big wads shoved inside the voids really don't offer much I don't think) and secured the sheathing a bit more effectively. Next weekend I install the siding! Hopefully.

6/09/2013

Master Bedroom Pt. 1

Posted by vanashke001

All the projects I've done have been in other parts of the house but I finally decided I should do something in my master. Admittedly it's not like anyone else goes in there, but hey, I sleep there!
I've collected quite a few Egyptian objet d'art; papyrus, tiles, etc but no real place to put them. Then I decided I had a whole wall in my bedroom that I could put them on. 
The only real issue I had was figuring out how best to arrange them. I'm still not thrilled with the end result, but it's a start. Next up, new headboard, book cases and perhaps a spot of paint.
Forgive the wires and stuff from the TV, I just installed it and the shelf so I hadn't really cleaned up.

I'll probably wind up rearranging them eventually. I'm not sure I love them all blown on one wall, but for now...

6/09/2013

TV Stand cum Buffet

Posted by vanashke001

Since I have moved my TV upstairs I had this fabulous TV stand that I got just gathering dust in the living room looking sad with no real purpose. It was too low to really display much on it and I decided I might have a better use for it.
I've needed more storage for some things from the kitchen and I didn't have any place to store my "fancy" plates. It was still a bit short for that purpose but then I remembered some hardware I had from my old bookcase that I made a few years back but had to sadly dismantle. So I grabbed the stainless uprights and my drill and some more lumber and paint from Home Depot and made a stand to put the TV stand on.
It's not ideal, but it's functional and I don't have a wasted piece of furniture. :)


It holds my pier one dishes, crock pot and the huge pot my beloved brother got me for making gumbo! I plan on getting some baskets and cook books to put below. Storage is always good!

6/09/2013

Washer/Dryer Pedestal

Posted by vanashke001

I have had my washer and dryer stacked since I got them a couple years ago. I have never really liked them like that but the cost of the snazzy pedestals that the manufacturer makes are stupid expensive. I've seen lots of how-to's online and finally decided I'd make my own.
The Supplies

(click to embiggen)

A couple of 2x10s (I wanted it to be as close to 12" tall as possible) a 5/8s" piece of plywood, wood glue and tons of screws later. 
The view from the top


From the bottom (I went to town on the 2x10s- I wanted it as solid as possible.)

Then I added the stainless flashing (which you can also see in the above photos) and I grabbed my drill and a wire brush and did some fun swirl action on it
  

Next I framed it out with some 4" trim that I painted black. Hey, when you have a theme...

 And, the final product, (ignore my poor tiles, and yes, I know I'm gonna have to move those heavy ass machines and pedestal all over again when I fix them. I just don't know how to do the tile yet and I honestly didn't realize how big it really would wind up being. I overestimated the size I needed but I figured it was safer to be too big than too small.)

And there you have it. I'm happy with them and all told it was about $100 a pretty good bargain if you ask me. Just one of those pedestals is $299. I don't have storage in this but I have a few shelves so I think I'm okay with that.

3/15/2012

New Paint!

Posted by vanashke001

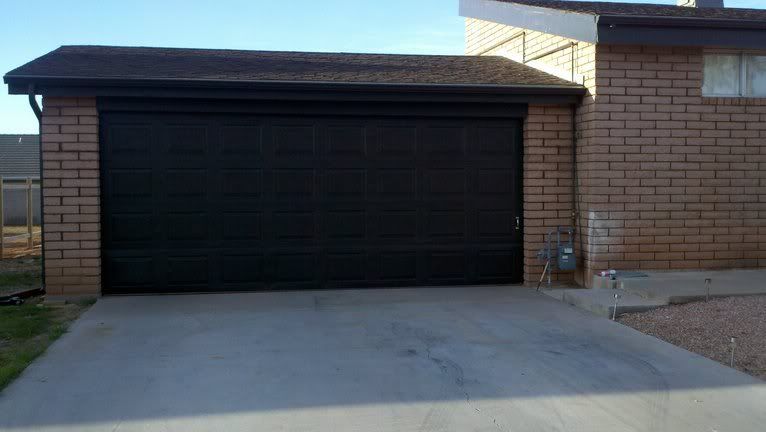
I finally finished painting the garage door! It looks so lovely. I do still need to finish the trim of the house and the front door but I feel so accomplished with making the door look complete. Now with having wired the garage and putting a door on the back as well as enclosing the eaves with a half-assed soffit and closing the gap above the second-hand door, I can actually use the garage for more than just storing the vehicles. Lights and more outlets were the big things. I'll be posting some pics of those later once I get it all finished up and looking prettier. But for now, feast your eyes on the goodness that is the garage door. ;)


3/14/2012

Black Toilet Seats. YES! NO!

Posted by vanashke001

A few months ago I was on a quest, a quest to make my bathrooms look fabulous and cohesive and tied together. Roomie Constance and I had gone to mucho trouble to repaint the cabinets and mirrors in our respective bathrooms an awesome modern black. They look really good if we do say so ourselves. And we do. Throw in some nice nickle hardware and those poop palaces look fabulous, see here.
One problem though, Roomie Connie's toilet seat was in wretched shape and she found herself either struggling to stay on the damn thing as it wriggled around under her, or got her delicate bum cheeks pinched by the broken vinyl cover. I decided I'd come to her rescue. I mean I do own the stupid house, it was up to me to replace that hazard we referred to as a toilet seat.
So began my quest, I didn't want just the run of the mill toilet seat, I wanted one that would match her decor, and damnit while I was at it I might as well get one for my bathroom, even though the seat down there was fine.
Well, success! I discovered a place on Amazon that sold Black toilet seats! Huzzah!
In truth I was hoping for a black version of what I had downstairs; a dark oak natural grain toilet seat. I was only able to locate gloss versions. But I was like, heck yeah, sounds good! So I ordered two of those bad boys.
When the seats arrived I immediately eventually put them in, a day or so later. They looked magnificent. So modern. So classy. Perfect.
Imagine my dismay when a day later I looked at the one in the downstairs bathroom just a little too closely.
SHOCK AND HORROR! What the hell is that?!
There, outlined on our perfect toilet seat was an ass bum print. Mine or one of the roomies' is not known, probably a bit of both, or all three if we're being specific and accurate. This could not stand. (fear not, no images are forthcoming)
I immediately grabbed my Lysol wipes and went to town cleaning it. Of course I then had to wait to take care of business as I was worried what the wet Lysol would do to my delicate parts.
Why I was surprised by this development is unknown, possibly because I just didn't do the math.
Whenever we use something with a glossy surface we leave a smear behind; just look at your cellphone for verification of that fact. It's not just our faces that are covered in oils and dead skin; it's pretty much our whole body. Ew. As embarrassed as you might get when someone sees your cellphone now imagine that feeling when you realize you do that to a toilet seat. Now realize that you do that to every toilet seat, not just the black ones.
I am struggling with not changing out the toilet seats with standard wood or white ones, just so I am not confronted with the visible evidence of what we all leave behind. It's still gonna be there, I just won't see it. I guess there is some truth to the phrase, "out of sight is out of mind".
I don't blame either of the roomies for this, keep that clear, we are all the same and they are both fastidious in their hygiene, but... damn.
So, I'm either eventually gonna get new seats, again, or buy some ass gaskets disposable toilet seat covers, a ton of Lysol wipes, or learn to ignore it. I just highly doubt it will be that last choice. Oh god. What have I done?