Noobies VÜ

random mutterings and musings by me, myself, and I.

2/17/2014

Kitchen 2.0!

Posted by vanashke001

Hootie Hoo!
Got down to work again the last couple of weeks and redid my kitchen. I would love to eventually change the layout but until I have the moola for that I just have to update it when I can.
When I moved in the cabinets were tragic, you can check out my earlier posts about it here.
I have liked the black cabinets for a while now but I noticed that they show every little bit of dust as well as cat hair on the lower cabinets. I have no problem cleaning up after them but they never really seemed to come fully clean.
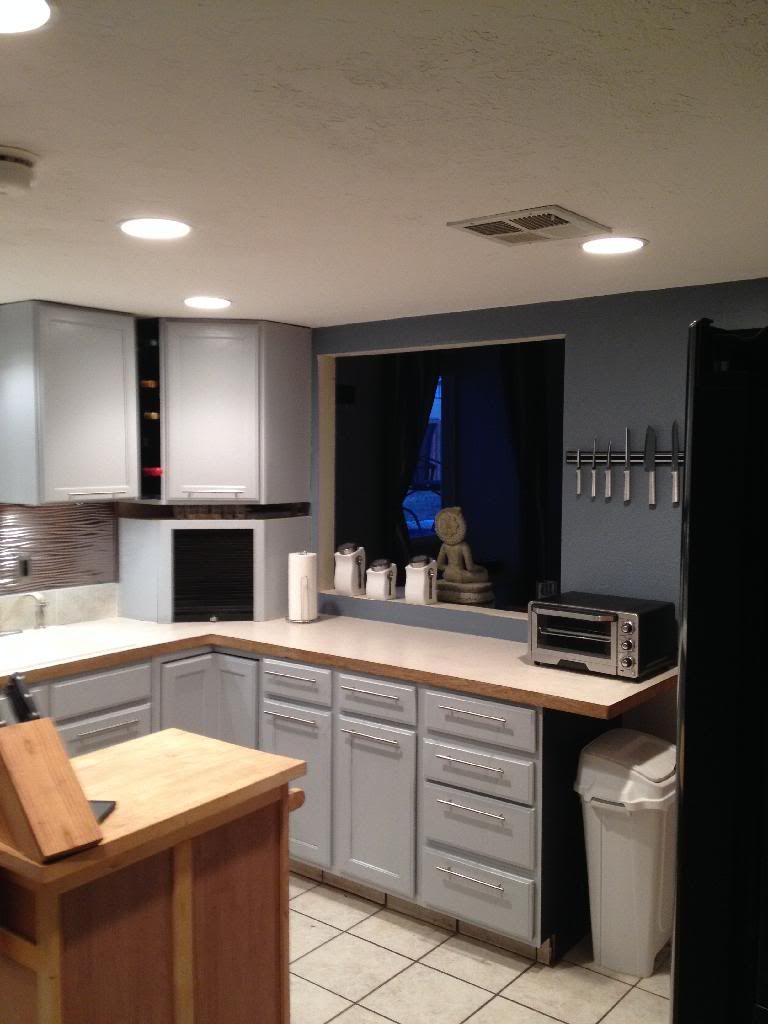
I also decided that they darkened the kitchen quite a bit and the appliances just faded into the background. I found a kitchen on Houzz that had grey cabinets and since that's a major color in my house I decided it might work out in the kitchen as well. 
I didn't want to go the same route that I did in the rest of the house however as I was hoping to avoid having everything blend together. Plus, with grey cabinets I didn't want them to blend into the background as well. I found a really nice blue from Behr that was just gorgeous and complimented the french silver I decided on for the cabinets. At first I was concerned that they would be too light as they weren't quite the grey I had originally planned on. I also thought at first that they looked a little baby blue-ish but they did turn out a very light grey so I'm happy. 
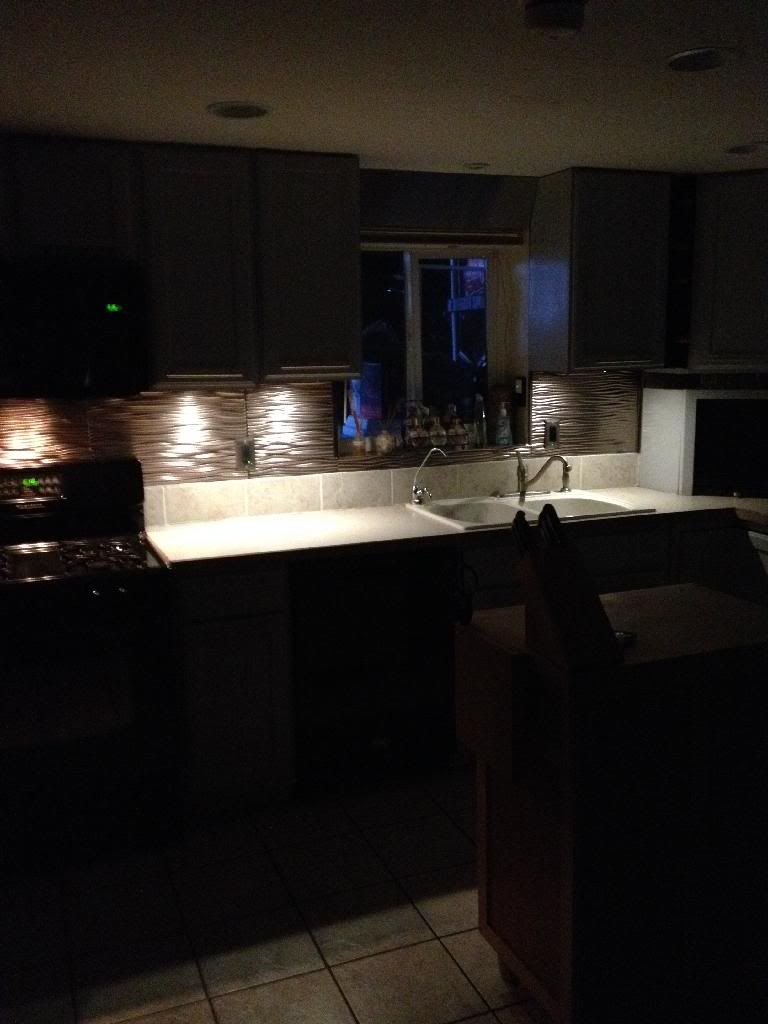
I also had to add some lighting as there was no light above the sink and I decided under cabinet lighting would be good as well. I am so excited about how it all turned out, throw in the Fasade backsplash and I am truly a happy camper. 
Before 
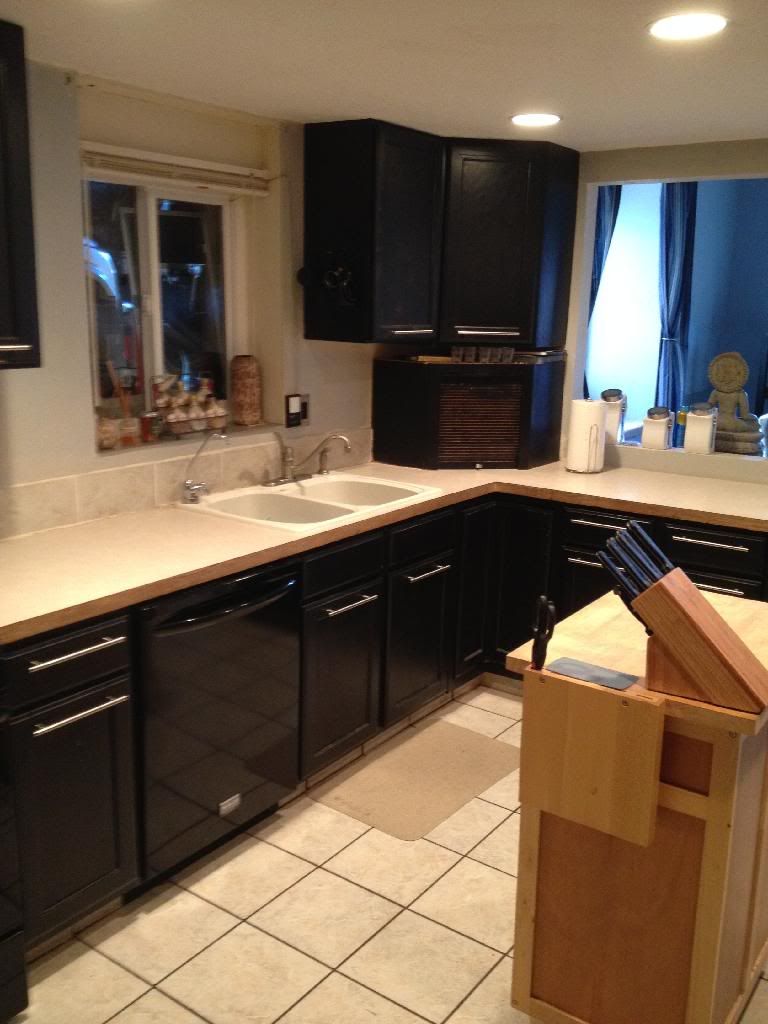
This is the black I had prior, also note the walls that hadn't been fully painted to the left and above the stove. It's true, we lived with that for at least a year. (as always, click on the pics to embiggen)
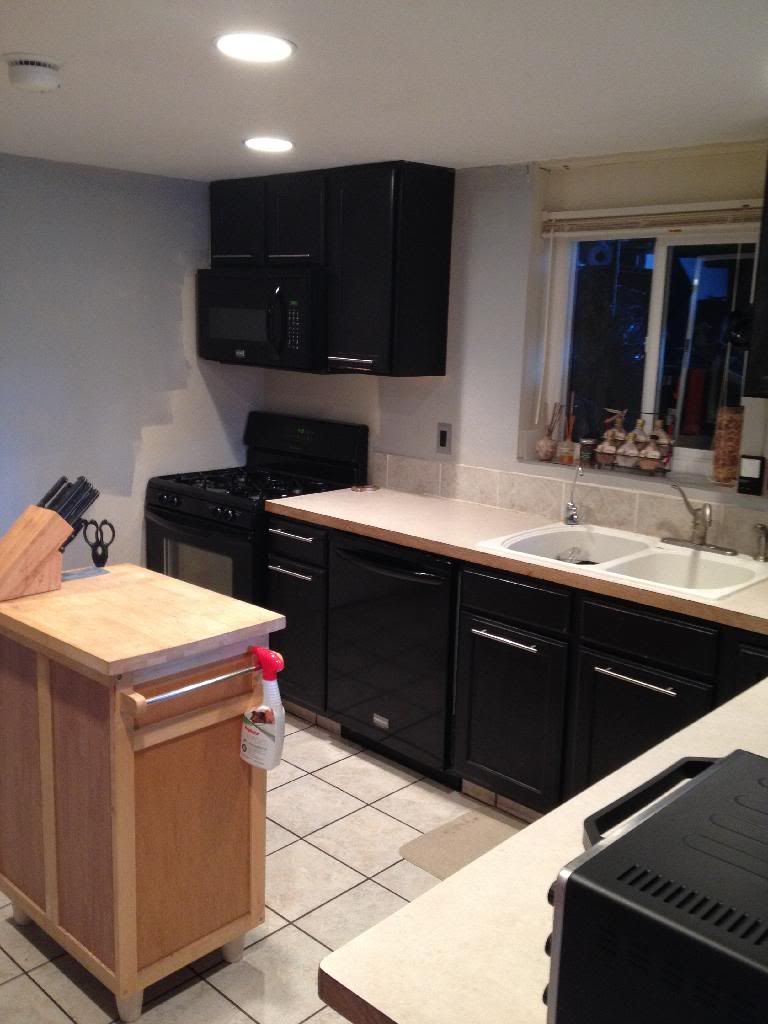
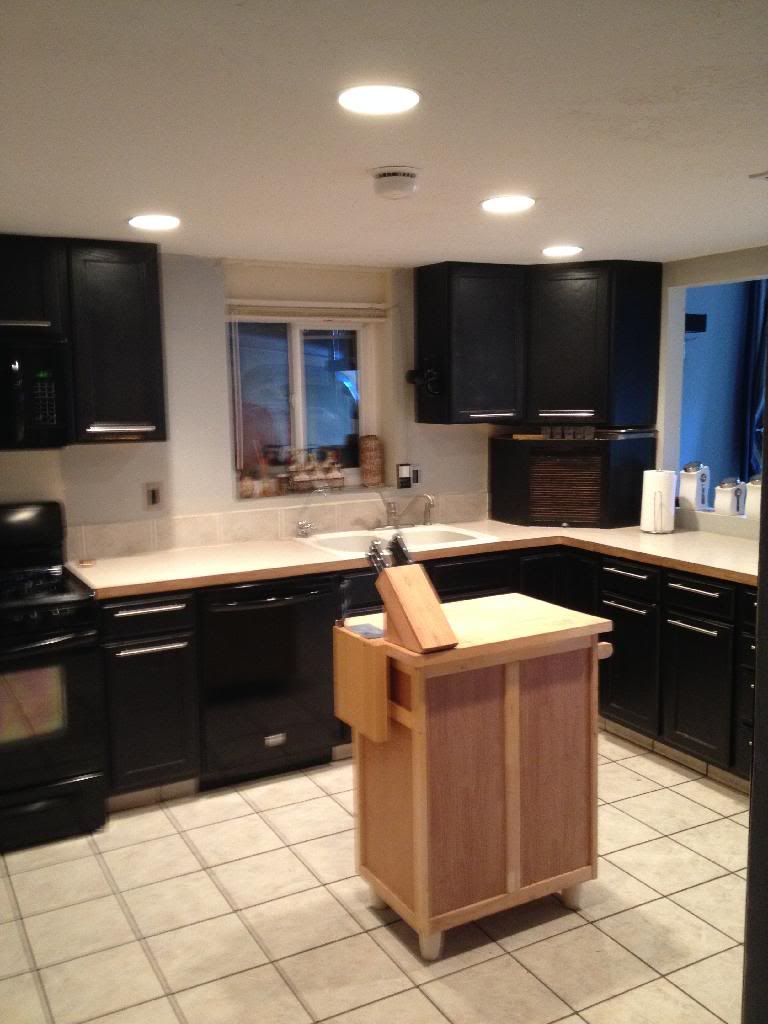
 I still think the black looked good, very modern but still. Another angle. I also never finished painting the roll up door on the appliance garage.
And the last one, before.
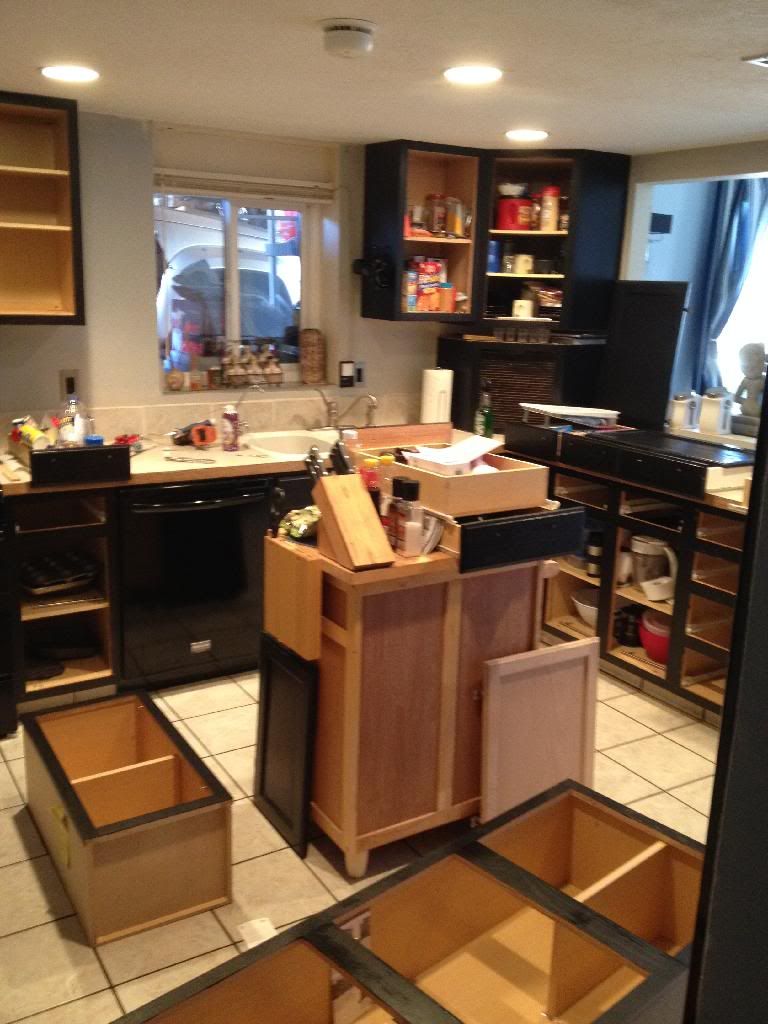
During the process:
The ones on the floor are new. The 3 door cupboard is for the laundry room.
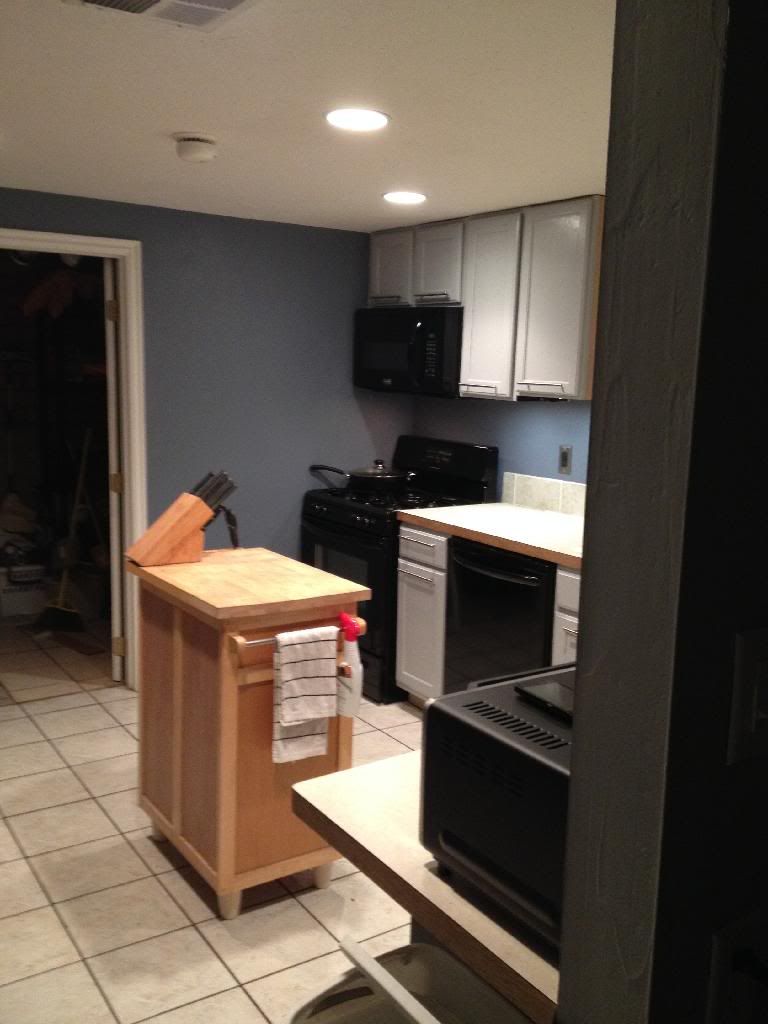
After painting, loving the blue and grey. Eagle eyed viewers will notice the new cabinet. Thou shalt ignore the messy pantry.
Another angle:
Looks much fresher, cleaner, and also brighter. The black cable is for under cabinet lights that I added.
Yay, let there be light!
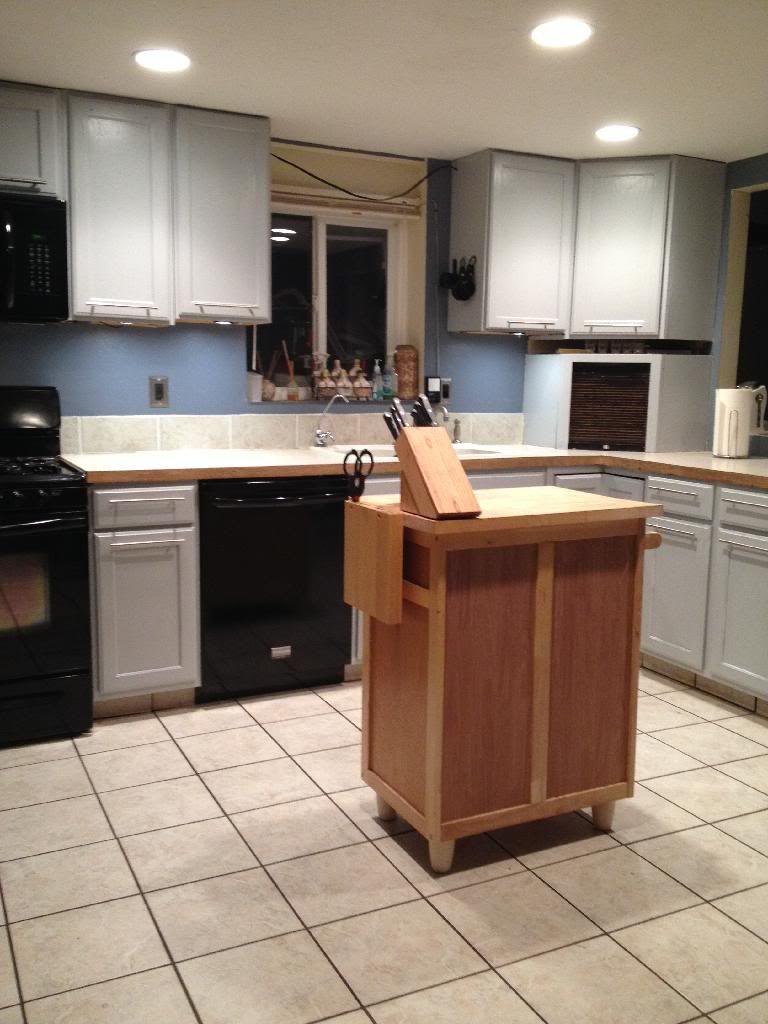
And now for the full after, I added some Fasade panels for a fun and interesting backsplash.
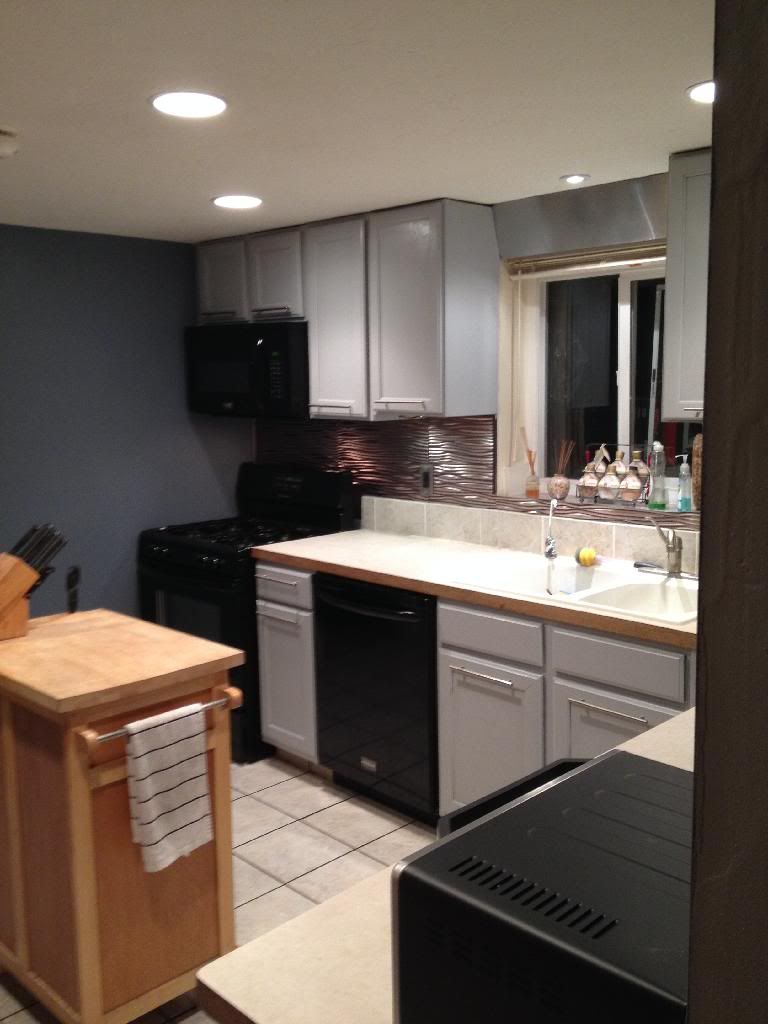
If you look closely you'll also see an added spotlight above the sink along with a stainless steel panel I am using to cover the wiring for the under cabinet lights.
I moved the right hand cabinet to the left to align it with the window. This opened up a space between it and the corner cabinet. I decided to add a wine rack/display shelf. Thou shalt ignore the garage.
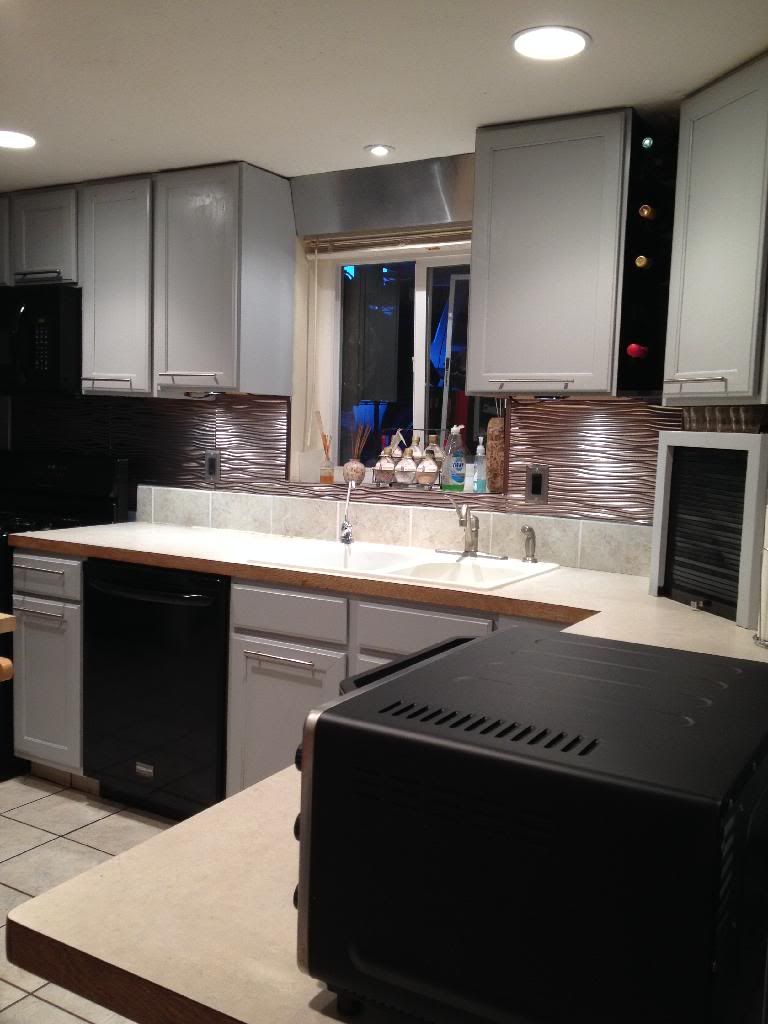
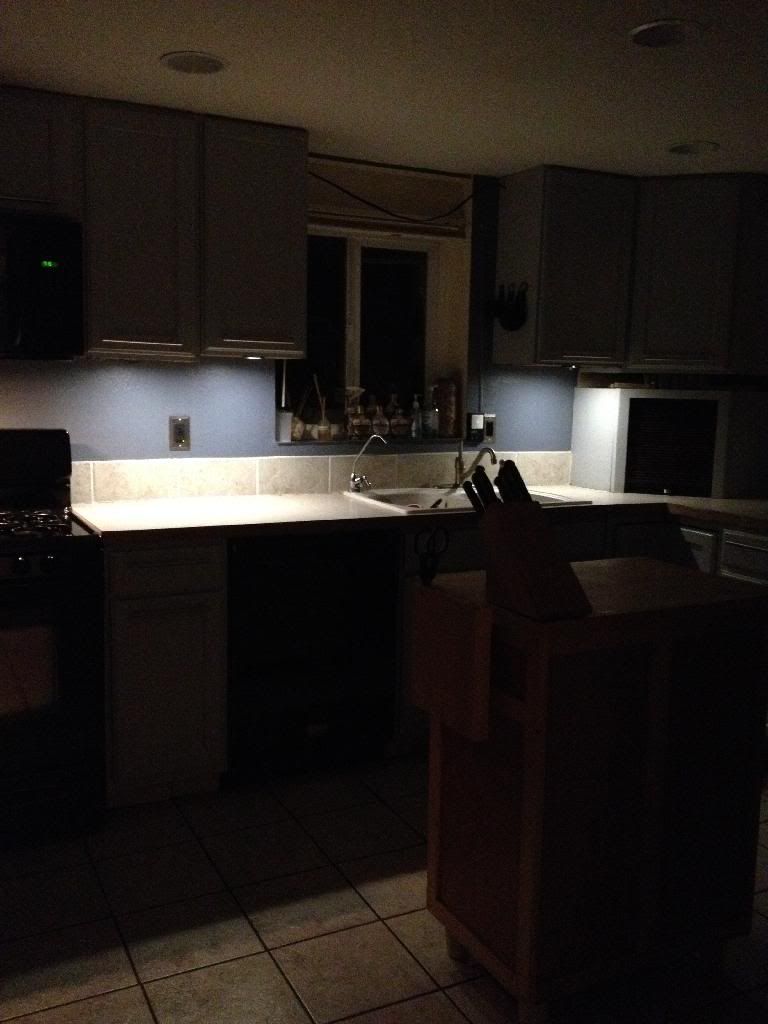
And now with just the accent lighting. It's funny that I used to think that the light above the oven was bright, now even with the under cabinet lights at their dimmest the oven's are still dimmer. There is no garage.
I even got my knives and magnetic knife rack installed!
I still have some plans for the future but it will be a while. I'd like to do a faux poured concrete counter top. I found a really groovy how-to on Pinterest that I am dying to do. It'll take 3 days though and I would have to remove the sink to do it. I'd love to one day align the sink with the window, right now it's almost a foot off center and it's annoying, but I would have to redo the whole floor plan.
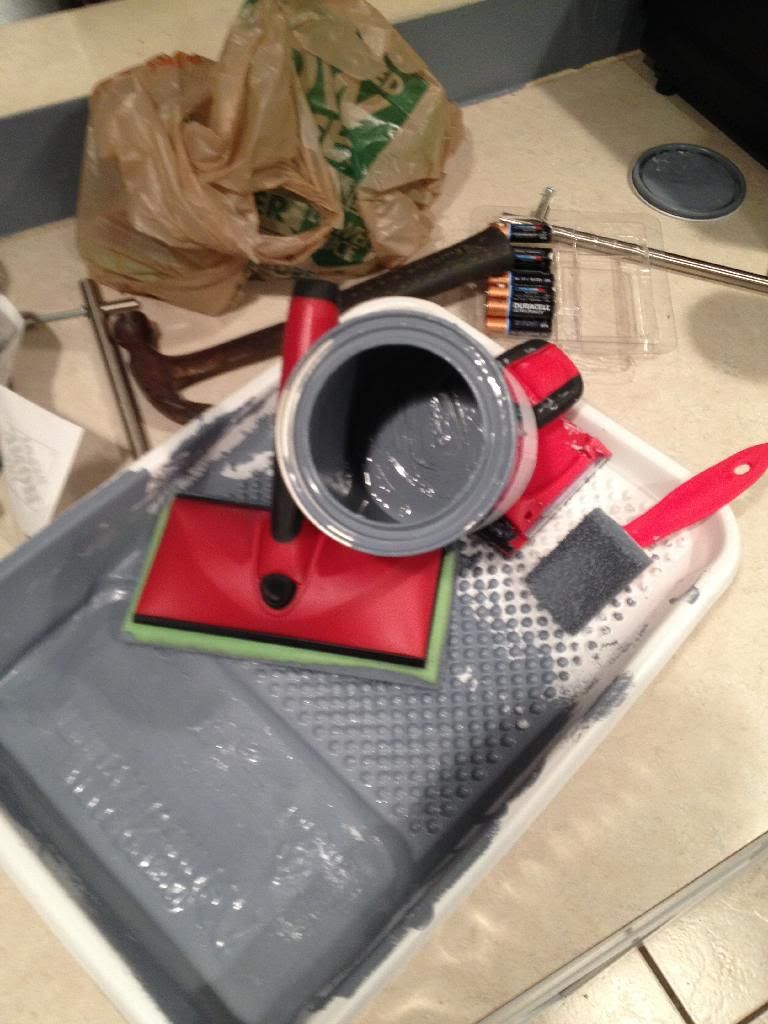
I was being really stingy with the paints I used. I didn't want have a bunch to waste so I just bought pints. I'll tell you, it was a close thing. I could have saved myself a little bit had I not painted before I put up the backsplash but since I wasn't sure when I would be able to get them I thought it would be good just in case. Then I decided to paint the wall beside the fridge, I just barely had enough and when I say barely, I mean scraping the sides of the can like a jar of peanut butter.
This is what I had left:
6/09/2013

Cheap Bastards

Posted by vanashke001

Once again I take up my hammer to try and make some improvements to my house. This one is gonna take a little time though, couple weekends worth.
My house is an odd house dear readers, it's kind of a stupid house, it's also unique and I do like it, but damn, every time I try to improve it I run into the idiocy of the former owners.
It gets wretched hot upstairs and I have a real difficult time dealing with it. It's one of those things that I find myself surprised that the people who lived here previously tolerated it. 
I was dubious that there was any insulation on the rear wall and the outside sheathing is looking really bad so I decided to put up some vinyl siding. After an annoying experience with an asshat for customer service at Lowe's (apparently I shouldn't shop for things on Sundays- duh.) I wound up at Home Depot and I found some really inexpensive siding.
Just a little aside, Lowe's has a ton of siding on their website, but they tell you there are 4 profiles and 12 colors, I challenge someone to locate them. Home Depot on the other hand doesn't have anything on their site except for fixture mounts. WTF? This was the reason for my trip to Lowe's but look out! Lowe's doesn't carry siding in their stores, you have to special order (just don't try to look for samples on a Sunday). But Home Depot actually carries siding.
Back to the siding I found at HD. They had a single box of 4.5" double lap for $46! They only carry 5" double lap now I guess. I can also tell you a single box will help no one. Except me! I only have to cover the upper bit above the back roof and it's 32' x 32" and this is more than enough for that. Just FYI, a box of siding is normally $158.
Here's the tragic back of my house, don't judge me I have a budget. lol


I pulled off the old sheathing to take a look at what was under it; I figured if I was going to side it I should go the extra mile and address the insulation as well.
This is what I found...

Just so you know, that is my AC ducting. The silver bit is about the size of a stock pot. So, most of my heating and cooling has been going into the void. Sigh.

Here's another shot in from a different area. They really did just redneck everything in this house. sigh


Last night and early this morning I put in more insulation (The big wads shoved inside the voids really don't offer much I don't think) and secured the sheathing a bit more effectively. Next weekend I install the siding! Hopefully.

6/09/2013

Master Bedroom Pt. 1

Posted by vanashke001

All the projects I've done have been in other parts of the house but I finally decided I should do something in my master. Admittedly it's not like anyone else goes in there, but hey, I sleep there!
I've collected quite a few Egyptian objet d'art; papyrus, tiles, etc but no real place to put them. Then I decided I had a whole wall in my bedroom that I could put them on. 
The only real issue I had was figuring out how best to arrange them. I'm still not thrilled with the end result, but it's a start. Next up, new headboard, book cases and perhaps a spot of paint.
Forgive the wires and stuff from the TV, I just installed it and the shelf so I hadn't really cleaned up.

I'll probably wind up rearranging them eventually. I'm not sure I love them all blown on one wall, but for now...

6/09/2013

TV Stand cum Buffet

Posted by vanashke001

Since I have moved my TV upstairs I had this fabulous TV stand that I got just gathering dust in the living room looking sad with no real purpose. It was too low to really display much on it and I decided I might have a better use for it.
I've needed more storage for some things from the kitchen and I didn't have any place to store my "fancy" plates. It was still a bit short for that purpose but then I remembered some hardware I had from my old bookcase that I made a few years back but had to sadly dismantle. So I grabbed the stainless uprights and my drill and some more lumber and paint from Home Depot and made a stand to put the TV stand on.
It's not ideal, but it's functional and I don't have a wasted piece of furniture. :)


It holds my pier one dishes, crock pot and the huge pot my beloved brother got me for making gumbo! I plan on getting some baskets and cook books to put below. Storage is always good!

6/09/2013

Washer/Dryer Pedestal

Posted by vanashke001

I have had my washer and dryer stacked since I got them a couple years ago. I have never really liked them like that but the cost of the snazzy pedestals that the manufacturer makes are stupid expensive. I've seen lots of how-to's online and finally decided I'd make my own.
The Supplies

(click to embiggen)

A couple of 2x10s (I wanted it to be as close to 12" tall as possible) a 5/8s" piece of plywood, wood glue and tons of screws later. 
The view from the top


From the bottom (I went to town on the 2x10s- I wanted it as solid as possible.)

Then I added the stainless flashing (which you can also see in the above photos) and I grabbed my drill and a wire brush and did some fun swirl action on it
  

Next I framed it out with some 4" trim that I painted black. Hey, when you have a theme...

 And, the final product, (ignore my poor tiles, and yes, I know I'm gonna have to move those heavy ass machines and pedestal all over again when I fix them. I just don't know how to do the tile yet and I honestly didn't realize how big it really would wind up being. I overestimated the size I needed but I figured it was safer to be too big than too small.)

And there you have it. I'm happy with them and all told it was about $100 a pretty good bargain if you ask me. Just one of those pedestals is $299. I don't have storage in this but I have a few shelves so I think I'm okay with that.

3/15/2012

New Paint!

Posted by vanashke001

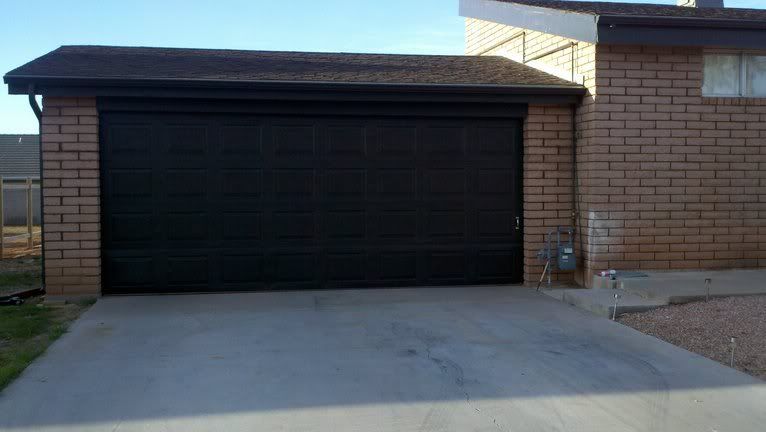
I finally finished painting the garage door! It looks so lovely. I do still need to finish the trim of the house and the front door but I feel so accomplished with making the door look complete. Now with having wired the garage and putting a door on the back as well as enclosing the eaves with a half-assed soffit and closing the gap above the second-hand door, I can actually use the garage for more than just storing the vehicles. Lights and more outlets were the big things. I'll be posting some pics of those later once I get it all finished up and looking prettier. But for now, feast your eyes on the goodness that is the garage door. ;)


3/14/2012

Black Toilet Seats. YES! NO!

Posted by vanashke001

A few months ago I was on a quest, a quest to make my bathrooms look fabulous and cohesive and tied together. Roomie Constance and I had gone to mucho trouble to repaint the cabinets and mirrors in our respective bathrooms an awesome modern black. They look really good if we do say so ourselves. And we do. Throw in some nice nickle hardware and those poop palaces look fabulous, see here.
One problem though, Roomie Connie's toilet seat was in wretched shape and she found herself either struggling to stay on the damn thing as it wriggled around under her, or got her delicate bum cheeks pinched by the broken vinyl cover. I decided I'd come to her rescue. I mean I do own the stupid house, it was up to me to replace that hazard we referred to as a toilet seat.
So began my quest, I didn't want just the run of the mill toilet seat, I wanted one that would match her decor, and damnit while I was at it I might as well get one for my bathroom, even though the seat down there was fine.
Well, success! I discovered a place on Amazon that sold Black toilet seats! Huzzah!
In truth I was hoping for a black version of what I had downstairs; a dark oak natural grain toilet seat. I was only able to locate gloss versions. But I was like, heck yeah, sounds good! So I ordered two of those bad boys.
When the seats arrived I immediately eventually put them in, a day or so later. They looked magnificent. So modern. So classy. Perfect.
Imagine my dismay when a day later I looked at the one in the downstairs bathroom just a little too closely.
SHOCK AND HORROR! What the hell is that?!
There, outlined on our perfect toilet seat was an ass bum print. Mine or one of the roomies' is not known, probably a bit of both, or all three if we're being specific and accurate. This could not stand. (fear not, no images are forthcoming)
I immediately grabbed my Lysol wipes and went to town cleaning it. Of course I then had to wait to take care of business as I was worried what the wet Lysol would do to my delicate parts.
Why I was surprised by this development is unknown, possibly because I just didn't do the math.
Whenever we use something with a glossy surface we leave a smear behind; just look at your cellphone for verification of that fact. It's not just our faces that are covered in oils and dead skin; it's pretty much our whole body. Ew. As embarrassed as you might get when someone sees your cellphone now imagine that feeling when you realize you do that to a toilet seat. Now realize that you do that to every toilet seat, not just the black ones.
I am struggling with not changing out the toilet seats with standard wood or white ones, just so I am not confronted with the visible evidence of what we all leave behind. It's still gonna be there, I just won't see it. I guess there is some truth to the phrase, "out of sight is out of mind".
I don't blame either of the roomies for this, keep that clear, we are all the same and they are both fastidious in their hygiene, but... damn.
So, I'm either eventually gonna get new seats, again, or buy some ass gaskets disposable toilet seat covers, a ton of Lysol wipes, or learn to ignore it. I just highly doubt it will be that last choice. Oh god. What have I done?

12/07/2011

I Gots Gutters

Posted by vanashke001

On this never ending quest of getting my house where it should be (IMHO) I  got one step closer to the non-end.
Gutters! This hovel house is over 20 years old and none of the previous owners put on gutters! What. The. Hell? It doesn't make much sense to me the amount of corner cutting. I can be a lazy bastard corner cutter on some things, but on structural and energy efficiency I do my best not to. Now gutters are neither structural or energy efficient but they help keep water off the house. In the first year I lived in the house we had a BBQ out front against the wall. We had some pretty intense rain and it hit that BBQ and soaked the wall behind it. That wall was to the pantry and I could actually see that the wall was wet from inside. Even with the BBQ gone if the rain came from the north that wall would get a bit wet. It didn't get soaked through by any means but it just wasn't something I liked.
I checked out getting the materials myself and thought it would be a pretty easy little project that I could not possibly screw up do with few problems. On a whim I decided to price out the job with a contractor. Surprise surprise! It turned out the contractor was able to do the whole job for $30 cheaper than I could just get the materials for. To make it even better I didn't have to go through the whole speaking in tongues/throwing the hammer/drill in frustration part of the mod. Me likes that.
The only problem I had was that the guy I contracted with, though easy to talk to, had issues with his email and wasn't the best at returning calls. Took almost a week to get things sorted out. His crew also had a language barrier. Maybe it's just me, but I think it is useful to be able to communicate with people who are working on your house. Other than that, I think it worked out and I like the look of the gutters. It's not like I expected them to transform the house by any means, but I am still pretty satisfied with how it all looks.
As a result of getting the gutters done I actually got off my ass painted my trim a much darker color and I love it! Next up: rain chains and urn thingys.
Pics below, of course click to embiggen

with the old trim color, ick.
new trim color, "Stealth Jet"

with the gutters bad pic will replace tomorrow


8/15/2011

Doors Done! (almost)

Posted by vanashke001

So excited, I finally have my barn-style doors put in! They aren't completely done at this point.
I was able to make a couple of adjustments this morning that I had an epiphany about last night, so that was good. But I need to put on the hardware (handles) and finish putting the trim on beside the uprights to make it look purty. So how did this all begin? Here for your viewing pleasure, the tribulations of putting in doors in a house that didn't want them.

The people who owned the house before (not sure if it was them or the builders or someone in between, let's just leave it as the PODAs -previous owner dumb asses), apparently put doors in where there weren't any or at least changed it up. In painting the sunroom I discovered that there used to be a door into the dining room. It seems that the sunroom might have originally been open to the outside and was enclosed and then the door to the dining room covered and the door to the living room expanded. Or something. God knows. There were a couple of mysteries, I have stucco on the inside of the wall of the living room (covered now with drywall) and they chose to use scrap lumber for the framing. And when I say scrap, I mean they rummaged around in some scrap heap and then cobbled the frame together out of their discoveries. Really? I re-framed the whole doorway with 2x6 lumber WAY over-built. It cost me a whopping $36. Again I ask, really? Whenever they framed that door originally, I can guarantee the 2x4 wood that they used would not have cost more than $20. Stupid.
As you can see evidenced in the image below, they didn't just frame up the doorway with scrap they also built it out a bit to make it so the drywall was flush with the interior walls. The way they did that is lame as well, it would have been easier to simply build the frame mostly flush (accounting for drywall) in the first place instead of having to "shim" it out.
(as always, click to embiggen)

If you can't quite make out the bits check out the image below for a clearer picture.

Once I tore into the wall and got the whole frame removed (doors and windows above) I noticed some disturbing stuff, a good (or bad) amount of water damage- gonna have to figure out where the leak is, and some mold. GAH.

When I started to tear off the molding and casing some of the paint went with it. In HUGE pieces as you can see to the right of the doorway below. sigh. While I can frame and do nifty stuff like that I cannot drywall though I'd like to learn. But at this point it wasn't in the budget and I was worried about bringing in a "professional". For 1, I'm sure they would have told me a whole lot more was wrong and I honestly didn't want to know. And 2, it would have cost a lot I'm sure, and 3. I would have had to wait for their schedule. So I did what the PODAs did and just pretended the problem wasn't there. Sort of. I am aware of it and I hope to correct it once my skills are where they need to be.
All the framing I put up was simply in the doorway and it isn't load bearing, so I'm not too concerned, and the way I put it up I can easily pull it back down when I know how to fix the drywall. So for now, (could be decades let's be honest, I am my father's son) this will suffice.
In the image below you can see how the opening looks.

I had to narrow down the opening as the doors that were there before were 6' wide. The doors I am replacing them with are barely 5' but they are 8' tall which is why I had to tear everything out.

I chose to orient the doors all the way to the right (so the window AC can still blow into the living room to assist in cooling) so I had to make up the width on the left. I really had to think about this one for a bit as to how to cover the hole. Again, I don't drywall. So, I latched on the idea of making this wall a feature and tie in the stainless steel I used above the fireplace. Once I figure that out, it was on like donkey kong.

I had a hell of a time trying to find some barn door hardware that I could afford. The sleek modern stuff I wanted was $2000! WHAT?!

Lowe's and Home Depot were busts, but I did a search (thanks Google) and guess what? ACE Hardware to the rescue. So $150 odd bucks later I had hardware for me doors!

As for the doors, fantastic deal I happened to locate at the local ReStore (Habitat for Humanity), I had been looking for some time for some doors that would work and I happened to see them and thought they'd be perfect. Nice wood doors full panel and quite sleek and contemporary. They were raw and unfinished which suited me fine. Figured they'd be costly, but oh no, turns out the guy there wasn't supposed to accept them and he quoted us $20. For both! Tanya insisted on buying them for me to repay me for helping her with her water situation and I strapped em to the top o' me jeep and took em home. Where they sat for months.

The image below is the trial fit of the hardware and doors. I liked it immediately! The other doors swung out into the room and with the new couch just made the room seem really confined and much smaller than it was.
So the doors fit and all was well with the world. I found some stainless steel flashing at Home Depot (not where I got the stuff for the fireplace- this is important), and had to buy a 50' roll. Holy god! I only needed 16' but I was too lazy to run across town to Lowe's. I should have. This flashing was crap. Scraped up and was no where near as shiny and sleek looking. Of the 50' I was just able to pull out about 20' that wasn't marred or otherwise unattractive. Then came the hard part.

I had decided to wrap some 2x10s that I got to help me cover the hole on the left and then match the look on the right (and frankly help cover where the drywall was damaged from the water and the paint peeling off). Bending aluminum flashing did not turn out as easy as I thought it would. sigh. I was a DIY version of the keystone cops. So many things went wrong I can't even number them all. Suffice it to say it was a travesty. As you can see from the image below, trying to bend it with my fingers along a straight edge a little at a time was not good. Buckling and denting and crooked edges do not a pretty wrap make. sigh.

I soldiered on and kept hoping for the best but the minute I put them up and trimmed around them I knew it wasn't going to work. They looked just fine with the doors open (and let's be honest most of the time they would be), but once you closed them. GAH!
Buckle city. Just horrendous.

So I yanked them down and went on a quest for what I could do instead. Well I went to my trusted Lowe's and found some narrower flashing that was 25' in length and much cheaper and of much better quality. I didn't bend it around the posts instead I got some aluminum L channel and used that to frame them and I think it turned out marvelously! So much happier!

As you can see from the pics below I think it turned out really well. Maybe not perfect, but I am rarely completely satisfied with my projects since I can see all the flaws.

So ultimately, this is the run down: I ran the flashing to the ceiling, not certain I am going to keep it like that I do have an old framed photograph that was my father's that I might put up above the window to see how that looks, but I might just bring them down to the top of the window. I grabbed my drill and wire brush and scuffed up the track for the doors, thought that looked cool. I thought about doing it to the flashing (looks really nifty) but I didn't since then it wouldn't match the flashing above the fireplace. Then I located a piece of glass to use as a transom above the doors. $3 ReStore. So for cost I am into it $150 for the track and wheels, $20 for the doors, $3 for the window, $41 for the crap flashing, $23 for the good stuff, $36 for the framing lumber, roughly $25 for the trim, $14 for the handles, and $14 for the metal pieces I had to use to cover the old doorknob holes. Total price $326 oh and $24 for the paint but I'll be using that all around the house so I didn't figure that in. If you take off the doors,
since I didn't pay for them, and if I could pretend the first flashing never happened, I almost got it done for less than $300. I feel pretty good about that. Time invested: 3 weekends, about 60 hours.

The results below, comments?
Open.
Closed. I will be rearranging where I put the shelves, the doors are really pretty and I'd like them to be seen. :o)

Future bits to be done: I'd like to put in glass, preferably some frosted stuff or something so we can get the light into the room even with them closed (the sunroom gets a little cooler in the winter) and then I need to finish the opposite side. Other than that, for the time being, I am mostly done. lol

7/25/2011

WARNING: House Under Quarantine

Posted by vanashke001

It's true, my home is contagious!
I have the decorating bug, I've tried to find treatment but to no avail. Well (un)fortunately my roomie has found herself infected as well.
It started with painting her room; a lovely green shade, and finding herself a snazzy mirror to accent it as well.
It has since moved into her bathroom. The other roommate has moved on to greener pastures and with no plan on replacing him she took the opportunity to make her bathroom her own.
Originally she was going to go with a nice blue theme. But upon finding the following shower curtain everything changed! I present to you,
Symptom 1: A hideous bathroom. (as always, click to embiggin)

Treatment 1: a snazzy shower curtain!

Symptom 2: Ugly cabinet with uglier hardware and huge outlet gash.
Treatment 2: New color and hardware and snazzy outlet and cover!

Symptom 3: Hideous mirror (unseen light fixture) and cabinet.

Treatment 3: Fancy paint and hardware, and new clock, (unseen new fixture), more outlets and covers

Same Symptom as above, new angle more ugly

Treatment 3.1 New hardware for towels and the like!

I think the roomie did a fabulous job and I love the fact that she feels more comfortable now. It's always been my desire to have the roomies feel like they can dig in and make something more to their liking. Fortunately this is also to my liking. bonus all around!

7/05/2011

My Walls CAN Talk

Posted by vanashke001

I have conquered my wall!
I was concerned that I had wasted money on getting my new speakers and after a couple weeks of thinking I realized that I could make it work without any real modifications.
As you can see from the pic below I had NO extra space between my studs for my speaker placement. The only other thing I might do is use my Dremel and make a couple small reliefs in the studs so that I can engage the little clamps that hold the speakers in place, but the hole is tight enough, I don't know if it will be necessary.


You can see the mostly finished product below, all I have left to do is paint, but since I am changing the wall color it'll be a little bit before I jump into that part of the project.


Unfortunately I was stymied on being able to run the wires behind my trim along the floor. Sigh, I don't know what size of sill plate they used but it's not a 2x4, so I'll have to think about that one again too. I'm thinking I might use a second piece a trim above the first a little ways, maybe make it look like it's architectural if I can. About the only thing I can think of.

6/20/2011

My House Hates Me

Posted by vanashke001

It would seem that every damn time I try to do something in my house I find some random thing that keeps me from doing so. Sigh. When I tried to mount my television on the wall I discovered that the studs were too far apart where I wanted to place it. I had to span the space between the two studs that were in the best place (read: closest to the center of the wall) so that I would have something to attach the mount to. So now I have these horrid lengths of 2x4 stuck on the wall. The tv mostly covers them, but from above (which you can see from the walkway upstairs) and from the side they are plainly visible. I realized that the studs were spaced farther apart then normal because of the AC vent that is in the wall. (for the uninitiated: most studs in residential construction are 16" on center- the two I needed were over 2 feet apart so the mount wouldn't reach).

After getting my new couch I decided that it is just too damn cluttered in the room and along that wall. I decided to de-clutter by replacing my current speakers (they are big floor speakers that had belonged to my father and sound really good but are a bit old, believe it or not I'm pretty sure they are older than I am- BIG EYES!) with some in-wall speakers.

Installing in-wall speakers does not concern me too much, cut a hole in the wall for the speaker and cut a hole in the bottom behind the floor molding to hide the wires and voila. Done. BUT my house had other ideas. First I had the studs I had to deal with to mount the tv, now I have to fight an over abundance of studs! My first thought was that the idiots were making up for the lack of studs in the middle of the wall. But then I thought that maybe it's to support the walkway above. I don't really know which of these is accurate. But regardless, I don't appear to have space enough (where I need it) to mount one of my damn speakers. All I need is 12" or so. Talk about frustrating. I may be able to get away with 8" but I am not even sure I have that. The speakers need to be 6-8' apart, (mine will be closer to 10' and the tv needs to be centered between them) so my options for placement are limited. the thing that sucks, the left hand speaker has plenty of space, the right... I have 4' to work with, and believe it or not, I have no option. there are that many damn studs or some other random obstacle. Sigh. Please see pic below for reference, the red are what I believe are studs.

I'm gonna see if I can squeeze out 8" since that is the bare minimum I can work with. We will see.

6/02/2011

New Seating!

Posted by vanashke001

A few months ago I happened upon a couch at Boulevard Home Furnishings (Blvd) that I fell in love with. This was kind of strange since I've always had a low opinion of Blvd based on three things, I felt they were overpriced, cheaply made, and almost exclusively traditional in style. But I was wanting to try and get a new couch or sectional and I hit all the other places in town (mostly with Connie in tow, poor kid. lol) and though I had seen some that I liked, none of them "spoke to me" shall we say.


So without much hope I surrendered and went to Blvd just to see what I might find. Most suspicions were borne out not long after walking through the doors. Most of the furniture was extremely traditional in design and style and the ones I did see that I somewhat liked were very expensive. (of course)

Then as I was walking down the main aisle I saw this vision of a dream, a sectional of contemporary design that literally stopped me in my tracks. I was like, oh. mah. god. I have found my holy grail. lol. Not quite. While it seemed to avoid two of the aforementioned expectations: cheaply made and traditional, it did not avoid possibly the most important, it was EXPENSIVE (to me.), $3000 for the set. *big eyes!
Since I prefer paying in cash, it was not gonna happen until I did some saving, and that was gonna take a while. With a sigh I surrendered the fantasy.

Then over the Memorial Day holiday I decided to see what else they might have to offer.
And voila, there is was and it was almost half off! Only $1700! To say I was excited would be accurate. I still didn't have the cash, but I decided to again leave it up to fate (it served me well thus far, eh?) I decided to go ahead and finance it. If I got financing so be it, if not, so be it. Well I got it. yay! 12 months no interest.

The only snag... one piece was missing (thanks a hell of a lot Fitness Ridge, you just had to make your set two couches instead of a love seat/ couch combo. psh) So, the good news, it was actually even cheaper(!), $1400, but bad news, it was not the coveted couch/love seat configuration anymore, it was more, love seat/love seat. blah.

But I decided to heck with it. I have the financing, I love the look and all things considered what were the chances I find something I like as much. (also, it matches my dining set.)

So I bought it and it was delivered on Tuesday. Two things occurred to me upon its arrival: it's massive (things are always so much smaller on the showroom) and I wasn't sure if the dual love seat thing was going to work for me. And maybe it's not quite as comfortable as I thought. hmmm

But after living with it for a while and trying a few different arrangements in my living room I think I like it. I really love the look, I wish it had armrests near the table, but meh...

So without further ado, behold the Square1... (click images to embiggen, as always)


oh, before anyone opines that I should check online for a source to get the missing piece, I have exhausted that avenue. Apparently Emerald Furniture (the manufacturer) has discontinued it so I am not able to locate any additional pieces. booo But I have told Blvd that if they manage to get another piece to let me know. I've also written the manufacturer to see if they can provide me with another source. *fingers crossed.
Thoughts?

5/23/2011

Project Entryway

Posted by vanashke001

Hello all!
I got busy again this weekend (I just love having projects to do) and I covered my icky entryway floor with some new wood flooring. Okay, VINYL wood flooring, but I was mainly going for a look and I had a VERY limited budget to work with.Here is the before... (click to embiggen pix of course)


and the after...


I think it looks so much better and I was fortunate; I got it all for only $15 and it was the perfect amount (almost, I had 1 whole strip-with tape gunk on it, not really usable and the scraps amounted to pretty much 1 strip).

So that was project 1 (Well, 2, actually, I am not posting them in order. lol)

The other project was the recurring nightmare I call The Awning.

As you can see from this image, I had some work to do...


Yeah, it's not supposed to be bowed like that. hee hee. So I had to put in rafters at each of the posts. It comes down to the fact that I should have just poured concrete for the posts. The piers I used move in the ground so when I would increase the tension on the cables (or the wind kicked up and moved the awning material a bit) the posts would move. I didn't realize it was so bad until I started noticing how tight I was making the cables yet they kept getting loose. I thought that the turnbuckles were loosening. I was wrong. sigh.

So I put in the rafters and the funny thing is, now the bow goes the opposite direction. lol
I made all the posts plum but since they didn't all line up completely ( I measured them all before I dug but I would guess I wasn't accurate or else the holes weren't so great. (I knew I should have used a string-line.) Well I can make shit work, now I just gotta learn how to plan it better. Lol or else learn to ask for help instead of trying to do it all by my onesie all the time. I need a bf. lol

Looks like I will have to change how the awning material is hung up though. They have little plates you can just hammer through the material but that would negate the possibility of having it retractable at all. But oh well, the best laid plans of mice and men and all that.